
Right, I've done my survey. Generally GBR52 is structurally sound and there is no major sign of water ingress. There are however several areas of superficial damage and has some heavy damage on the hull and deck join (known as the sheer) which will need investigating and repairing to the original spec. Just about all of the damage has been caused by collision - none by fatique, and so it is logical that the repairs will not need to be over specification. There are also signs of previous repairs about half way along the length of the deck adjacent to the sheer and these repairs are looking a bit shaky now.
Here's the plan of attack to get things moving.
1. Weigh everything, particularly the hull as it is to see if it is overweight.
2. Remove the centre section of the deck for access to enable thorough repair of the most damaged sections.
3. Repair hull damage by inserting new core materials and laminating over on the inside (vacuum consolidate) then replace the skin on the outside of the by cutting back to outside the foam insert line.
4. Grind off the surface of the removed section of deck and use this surface to mould a copy of the main deck area in foam core and carbon sandwich - using the laminate spec of the newer boats
5. Check and if possible modify the internal structure to be as allowed by engineering authority.
6. Refit deck using new section as manufactured at 4.
7. Remove aluminium rack support tubes and replace with carbon fibre of similar dimensions. Fit sleeves to inside to allow for smaller diameter carbon fibre racks. Fit chainplate to sheer struts
8. Re-skin foredeck with 2x2 twill fabric to replace damaged material.
9. Weigh everything again!
10. Paint - colour tbc!
Ok, as they say on the TV - Here's one I made earlier. A busy weekend has taken us to half way through item 3... we are well into the major repair to the gunwhale.
As you can see above, we chopped out a large section of the working deck with a jigsaw, giving us excellent access to the major damage area. Note the wearing of latex gloves (you can't see the goggles and face mask) - often the dust generated by cutting can be an irritant.

With the deck off we can see what's going on. Removing the damaged section and trimming the existing structure back to a tidy solid shape is the first step. Make the corners radiused so that the skin does not crack under stress. The skin is cut back - then the foam core has been cut back 2 inches further than the skin. This allows the core replacement panel to bond directly onto the outside skin.


The next post will be us putting in the new foam core panel to replace the damaged material and laminating over it to finish the job - watch this space!!
 Saturday 24 October 12.10. Launched! The end of one adventure, the start of another!

 Stringing up the trampolines is a big deal - they take a couple of hours each side to get right, and that's using a pre made trampoline... We got through probably 30 metres or so of high tensile dyneema (cordura casing) to string them on, with each 'stitch' pulled as tight as we could get it, working the corners first, then the outboard edge, the inboard edge and finally the ends. Its a lot of string - and even more when you consider each tramp' has around 70 metres of string in it. When it's done properly, they are so tight they ping!
 Not that that is a prediction of when we will hit the water!! We weren't taking it easy here at carbonology HQ - As you can see we're assembling the racks now - The tube has been provided by our viking friend Soren Clausen at Xperion Tubes - Soren was racing in carnac last week in GP Covers (DEN1) and looked like they enjoyed the fresher days particularly! The tube is pull wound so it is particularly stable in torsion - which it is very good for rack tubes to be good at because once sailing, the loads are generally bending and twisting and strain can be in any direction or load case.


 In higher loaded areas, for example on the deck of an 18ft skiff where 3 blokes will run around while the boat bounces up and down, it is best not to leave too much to chance. As watertight and solid as it feels, 0/90 standard taping isn't enough. Instead we took some time and cut some 45deg/45deg tapes from a metre of standard woven fabric - in this case a 200g/sqm carbon fabric. Lay up, peel ply, wash up and rest assured that all of the fibre is doing something to hold the deck together - and consider torsional or sheer case loading, the fibre is more directly resistant to loads. Savvy?

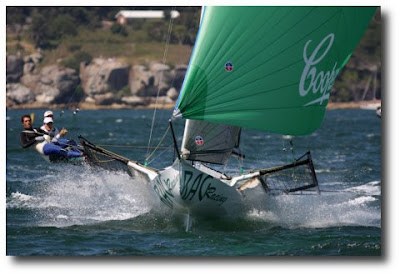
 The thing is I guess better materials, computer modelling and the relentless driver of competition has developed sailmaking to a proper science and meant in the last what, 5 years? the industry understands better why this rig is more efficient and goes faster - and it is not the area that does it.


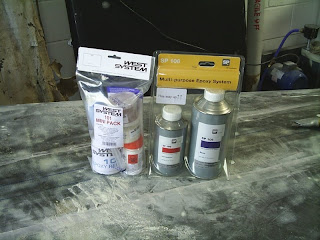
 Here's the whole stack. Working from the foam upwards - Reinforcements: 86g E-glass Woven, 200g Carbon Woven. Consumables: Peel Ply, Porous Release Film, Breather Fabric, Vacuum Bag Film. If you want to get hold of handy amounts of vac bagging materials have a look


 Then we're off - The mighty ex Rockport looking a bit deshevelled, but strapped down firmly and rolling along nicely. I had been a bit concerned about the trailer having stood out in all weathers for 2 years, so we checked the bearings a couple of times and generally took it easy -but in the end my fears were groundless - the trailer towed perfectly.
